Example - Adding the distance to source/mouth to network nodes
Scenario
You are studying the importance of tributary junctions, these are the nodes of the river network. RivEX can generate nodes and assign type using the create nodes tool. For your analysis you need the distance to source and distance to river mouth encoded into the node layer. This positional information could help explain other phenomena occurring across the river network. The workflow below describes the steps taken to pass these metrics into the node layer using an existing RivEX and system tool.
 The following guide relies on nodes created by RivEX, a simple step. If you edit the network (change/add/delete lines) you will have changed the underlying typology. This will have a knock on affect on the node ID's. So always make sure you are processing the very latest nodes that RivEX has created from the river network.
Workflow
|
Step |
Processing Task |
|
1 |
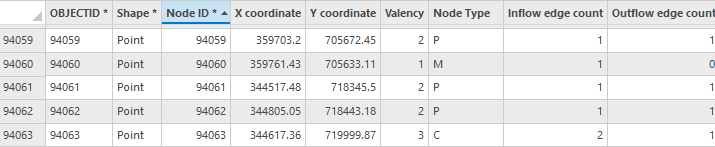
You have prepared your river network and created a node layer extracting out ALL nodes. A sample of the nodes created by RivEX is shown below along with their attribution.
© OpenRiversNetwork (ORN) 2023. GeoData Institute, University of Southampton. Contains OS data © Crown Copyright [and database right] (2023)
Note distance is not an attribute of the node, you will derive this and attach it to the nodes. |
|
2 |
RivEX has the Find source of site tool, this creates a table and it contains the distance from the site to its source\mouth node. You will use this tool to create a temporary table which you can join to the node layer passing in the distance field. If you review the help page for the Find source of site tool you will discover before you can use that tool you need to ensure the river network is attributed with Catchment ID, Source ID and distance to mouth. Run those tools and ensure the network is attributed with these values. |
|
3 |
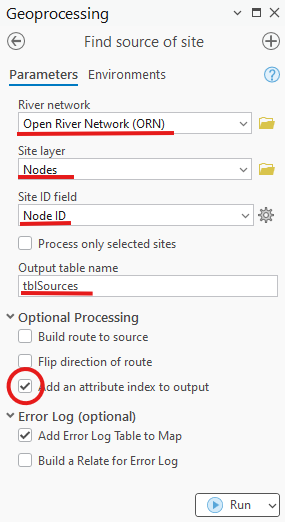
Complete and run the tool as shown below, it will create a table called tblSources which is added to the map
|
|
4 |
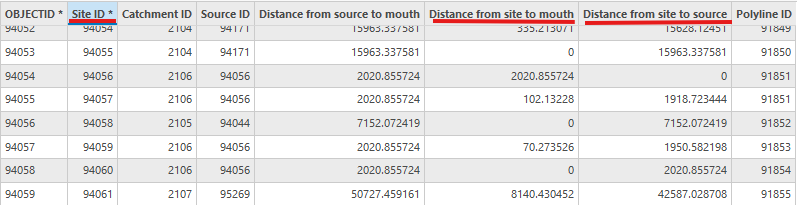
Open tblSource and review. As the tool is meant to be generic for any point dataset it refers to the points input ID, in your case the Node ID field, as the Site ID. It creates the two fields you need to be in your node layer. You could simply use this table but you need this information attached to the node layer. You do this in the next step.
|
|
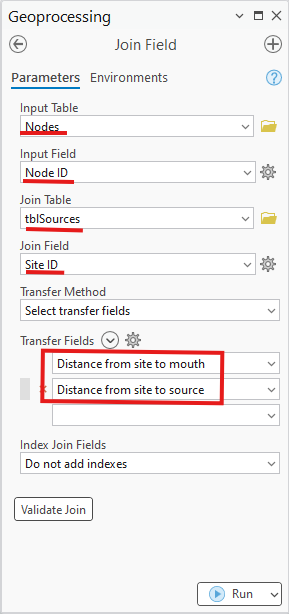
5 |
Open the geoprocessing pane and use the Find Tools search box at the top of the pane to find the Join Field tool. Complete as shown below then run it.
|
|
6 |
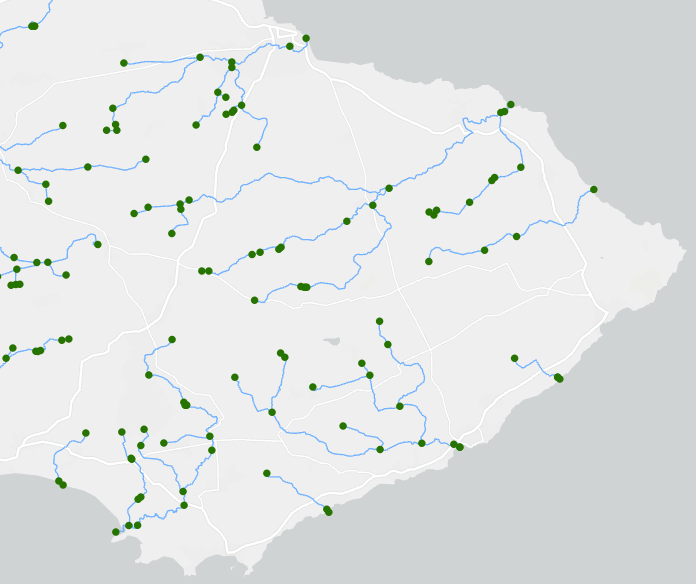
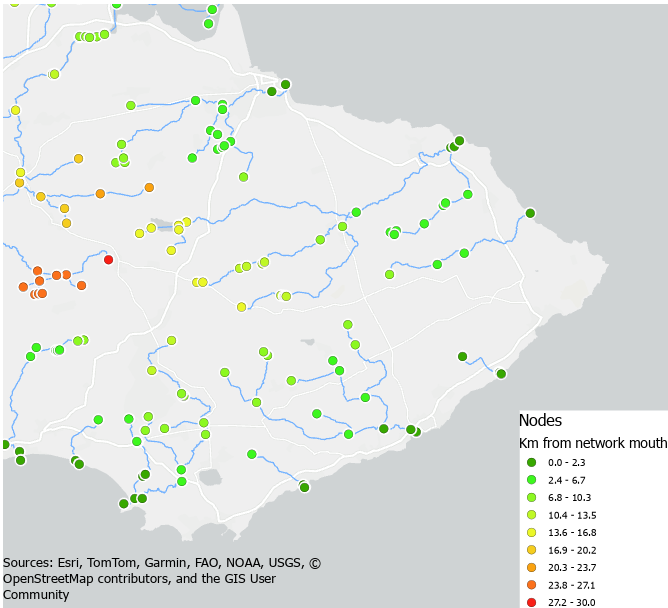
Open the attribute table of the node layer and you will see that the distance to source/mouth fields have been transferred. This dataset is now ready for further analysis but note the fields still refer to the values as distance from site. You can leave this as-is but the next step is an optional clean-up step. Below is an example of the nodes now colour code by distance to network mouth.
|
|
7 |
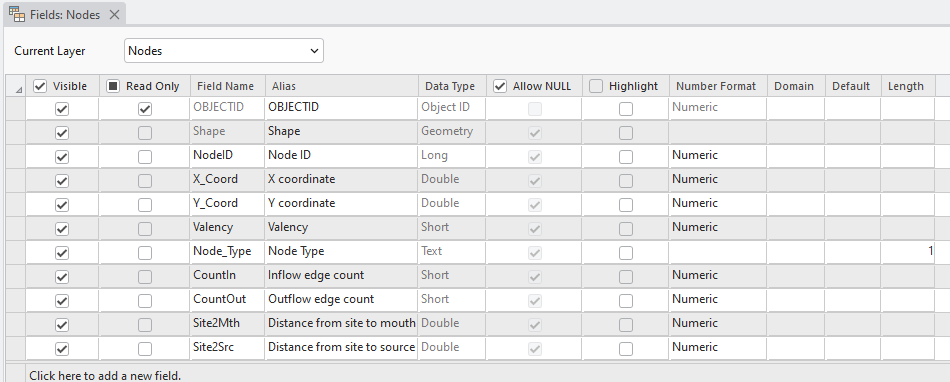
Optional Step RivEX always writes its outputs to a file geodatabase. One of the many advantages of writing to this format is you can easily change field names and their alias. Right click on the node layer in the Contents pane and select Data Design > Fields. In the Fields view you can see the field definitions. The last two fields are the fields transferred by the Join Field tool.
Double click into the field name and alias cells and update to what is shown below.
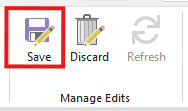
The green cells to the left indicate edits have been made and need saving. In the fields ribbon within the manage edit group, click on Save to commit your changes.
Return to the attribute table of the nodes layer and you will see the corrected field names. |
|
|
You have discovered that a single tool in RivEX generates all the information you required, its worth exploring the help file for RivEX! The above workflow could have been easily captured as a model, you might want to consider this if you need to regularly repeat such processing. |